|
|
Post by hyv3mynd on Jun 26, 2014 10:06:18 GMT -5
Here's the inspiration for the 2nd prince I found online. 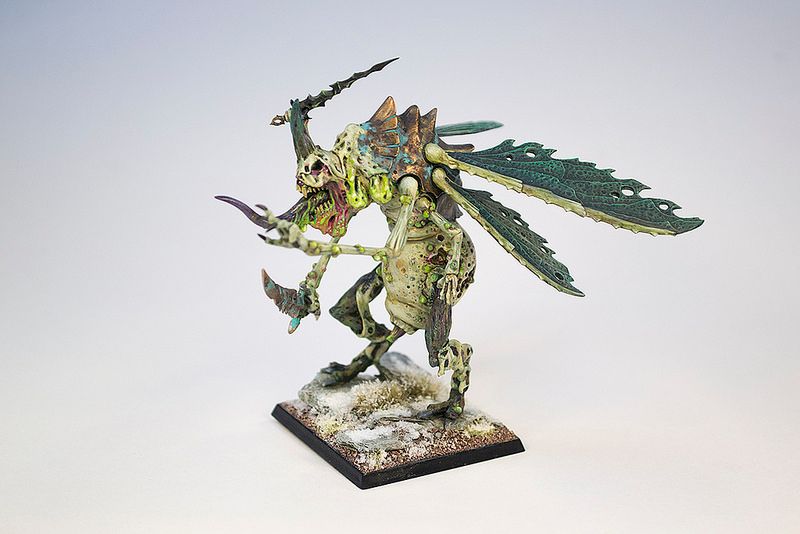 I always spend a few hours researching conversions before I start a project to see what cool things people have done. I decided against the fly wings as my first prince has them and I want the two to look different. Plus, with one using wings and the other using body/legs, I can still make 2 plague drones for what's left if I can resist cannibalizing them too. I do plan on doing a similar sculpt over the tyranid head so you can see where that's going. |
|
|
|
Post by hyv3mynd on Jul 1, 2014 22:49:01 GMT -5
Continuing to sculpt on the daemon prince and GUO tonight. 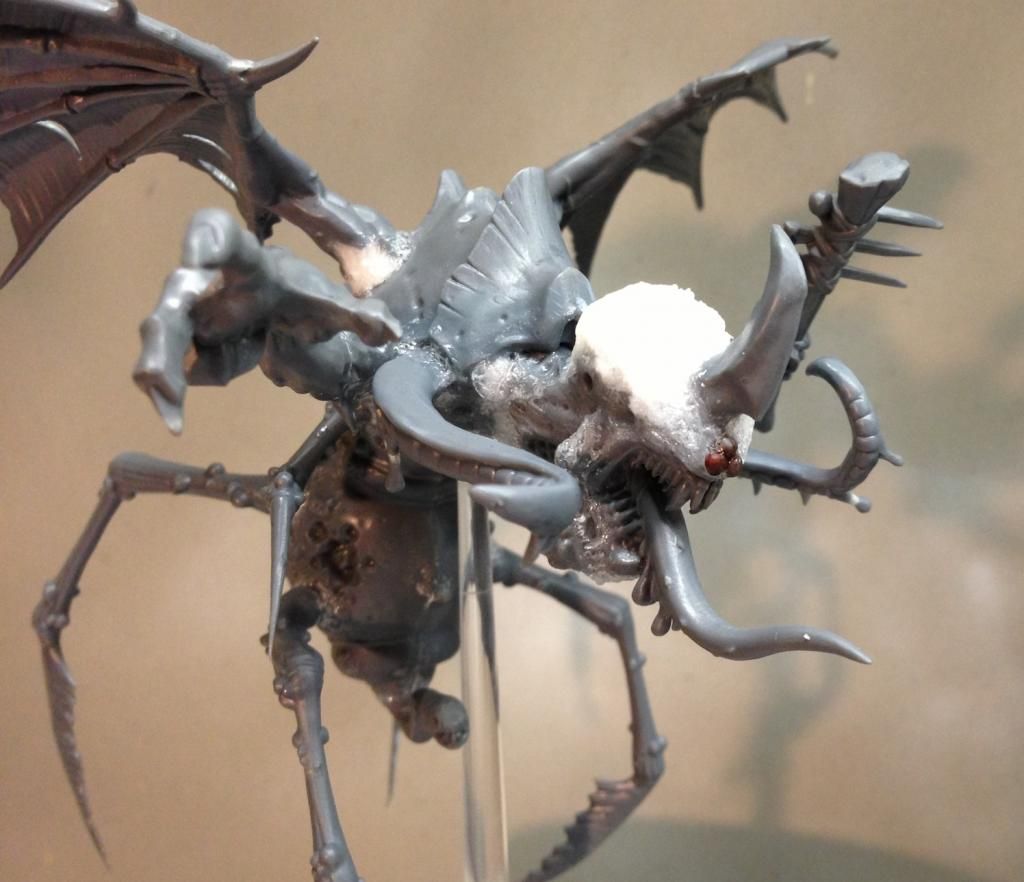 I shaved down the tyranid head and reshaped it with glues. I used 3 seeds, radish or turnip I can't remember, in a triangle formation for central eyes. 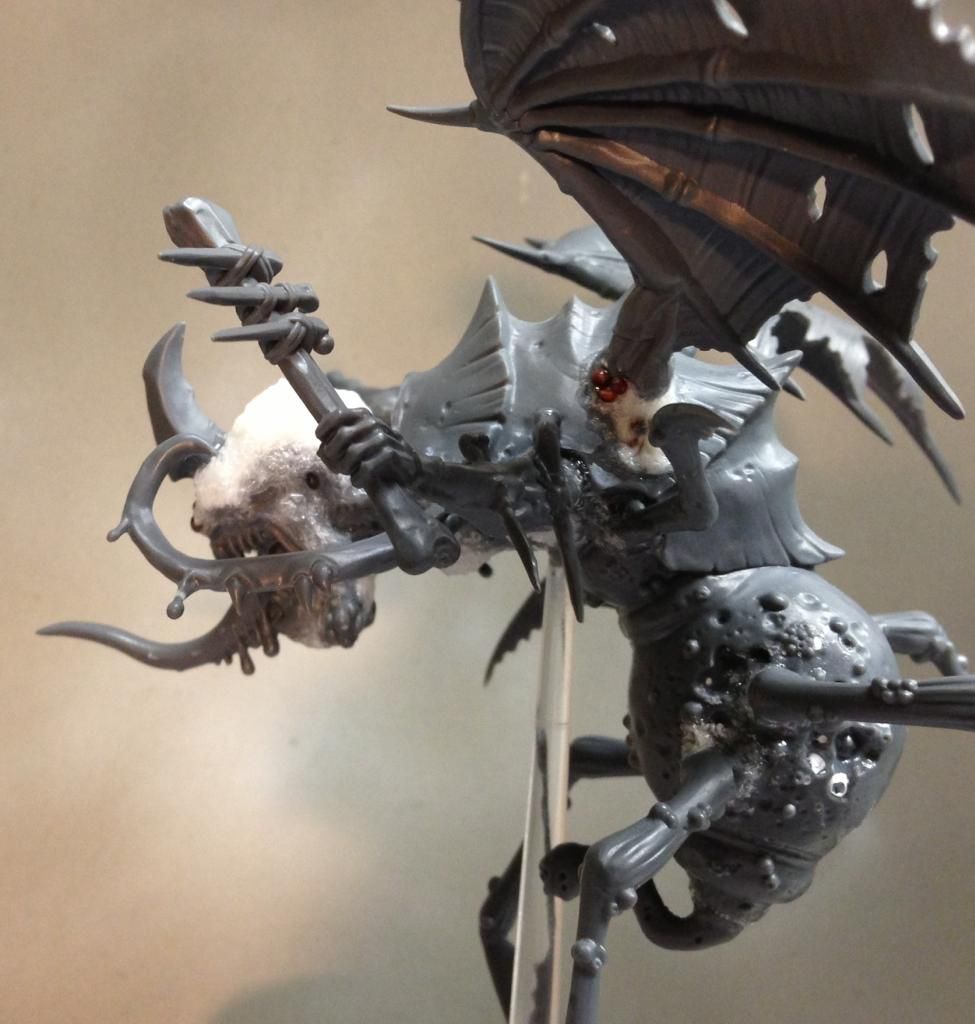 The glue sculpting technique was also used to blend all 6 arms,4 legs, and 2 wings. I also did some serious work on the GUO. 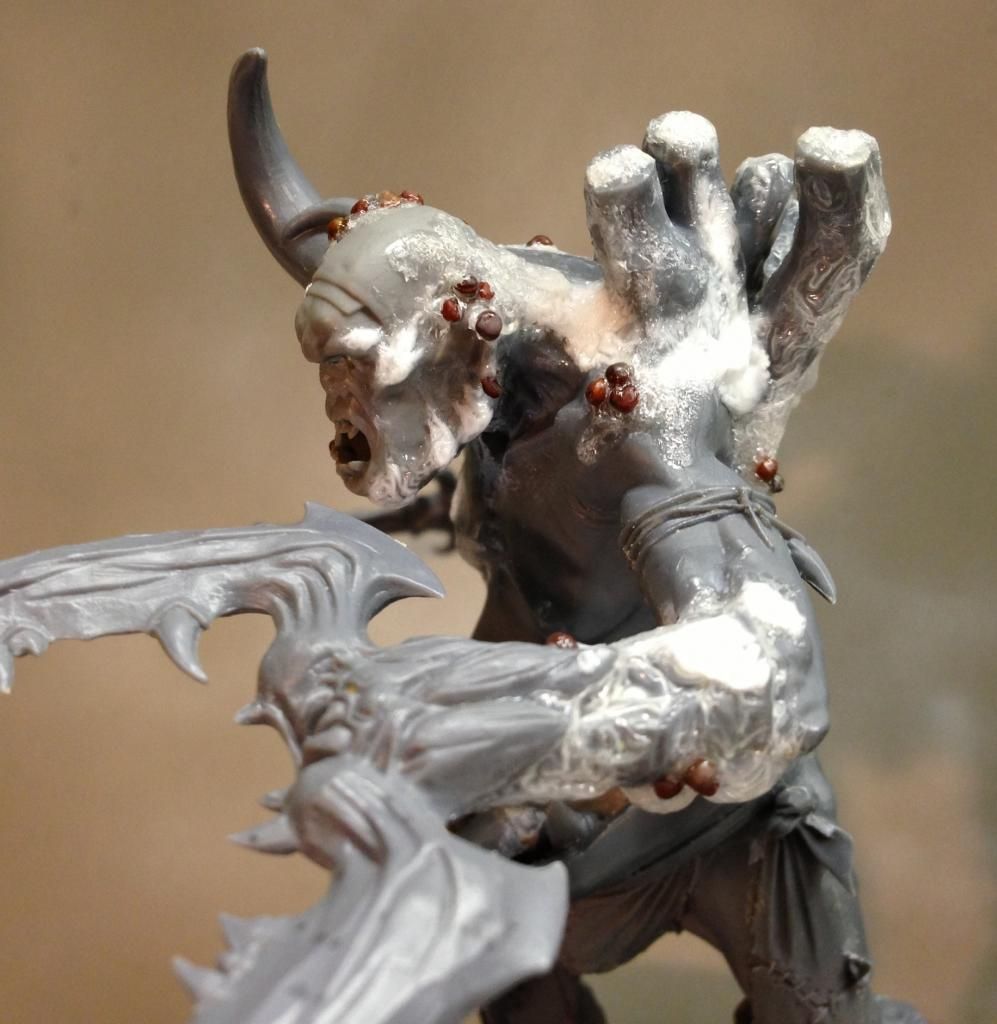 I added some plague vents on his back to belch out poison gas. I also continued to build up layers of glue and seeds which will look like boils and corrupted flesh when it's painted. 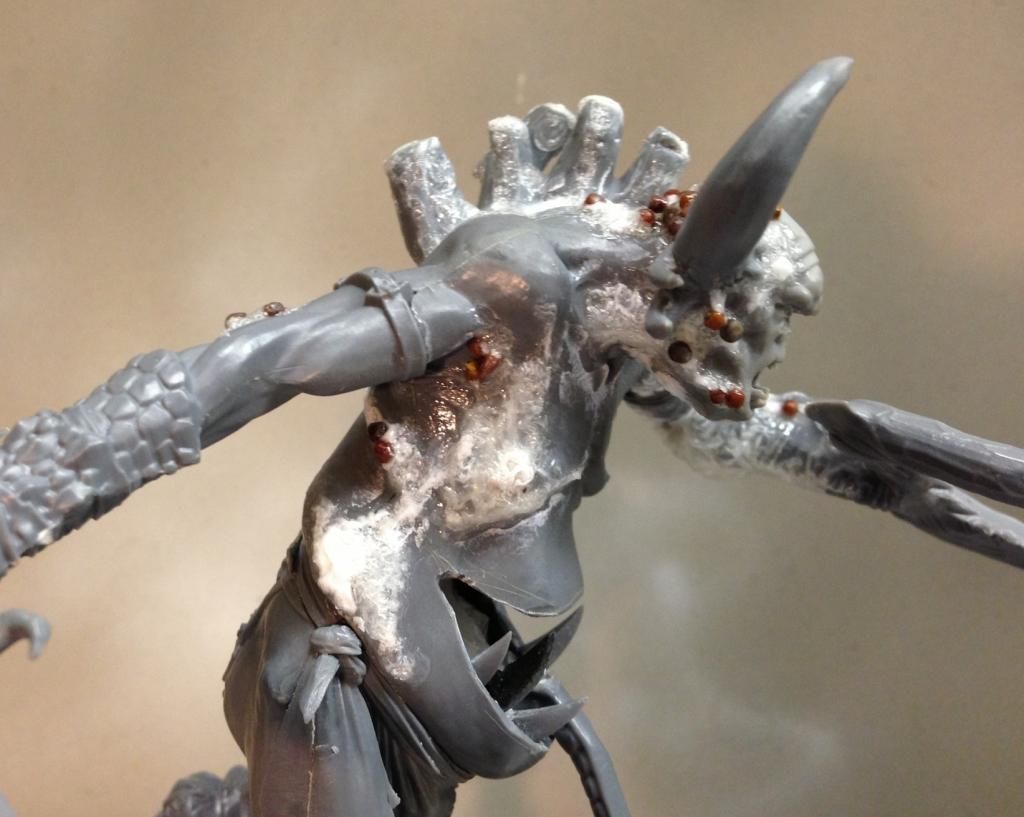 For this model, I put in a lot of work to redefine the profile and I want him to be really interesting to the eye. 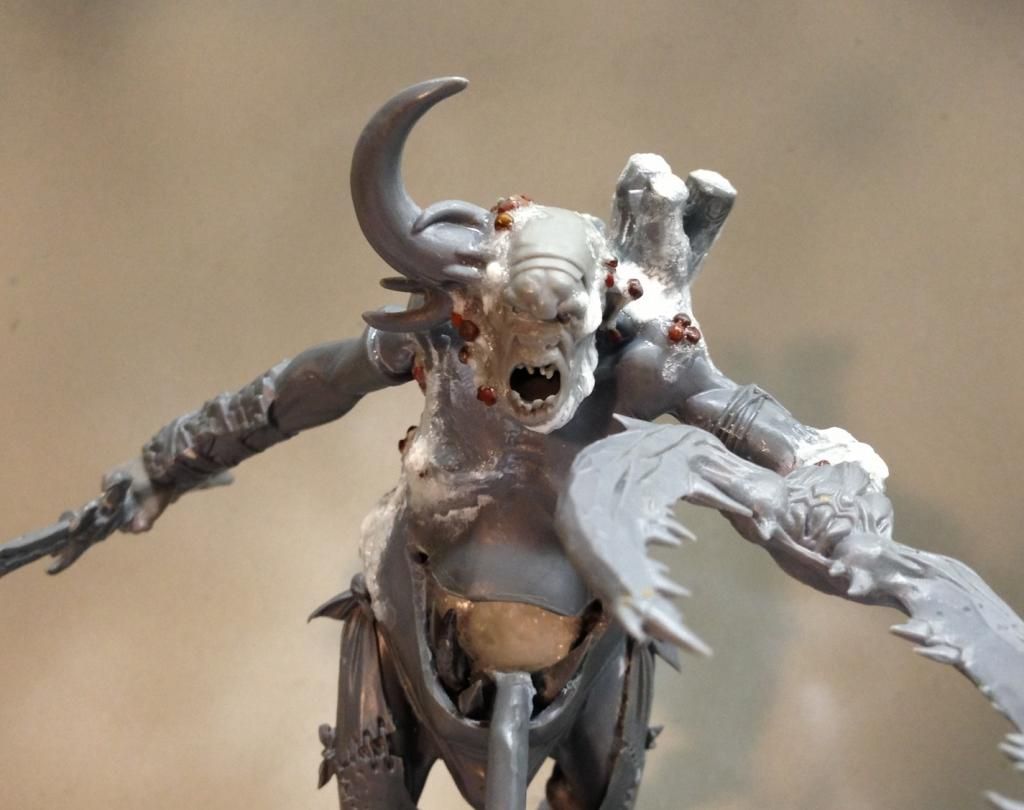 From the front you can see the asymmetry typical of plague bearers. When he's done, he will be a giant plague bearer that never stopped growing. |
|
|
|
Post by grubnards on Jul 2, 2014 8:52:26 GMT -5
Nice job as always. It was great to see them in person over the weekend, photos really don't do them justice.
What are the red bulbs you are using to represent scabs and boils in the skin? In the past I've used green stuff for those effects but whatever you use looks much easier to work with.
|
|
|
|
Post by hyv3mynd on Jul 2, 2014 9:18:28 GMT -5
Seeds. Either radish or turnip seeds I cannot remember. The garden factory sells them in clear bags so you can see the size and shape before you buy them.
|
|
|
|
Post by commissarkrad on Jul 2, 2014 20:25:17 GMT -5
Looking good, can't wait to see them with some paint!
|
|
|
|
Post by hyv3mynd on Jul 7, 2014 22:56:33 GMT -5
Started painting the fly prince tonight. 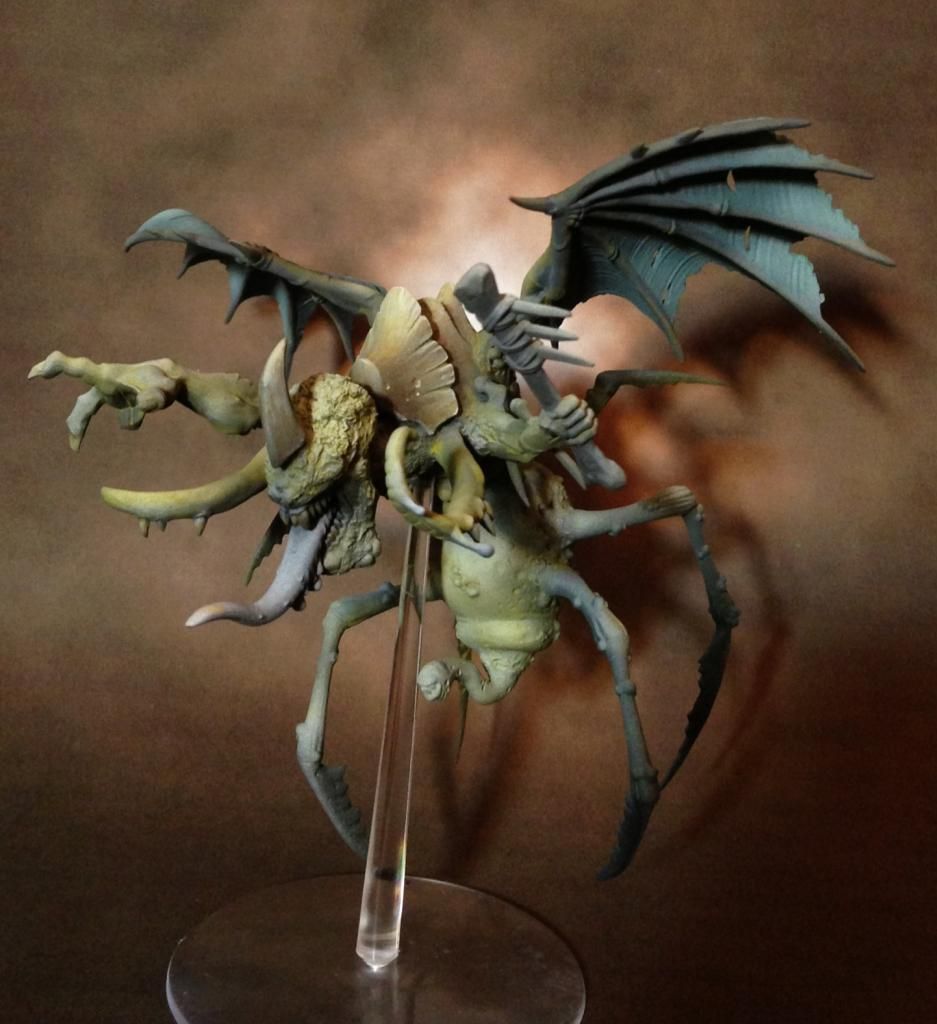 Just a pretty basic black/white zenithial pre-shading with the airbrush and some light color washes so far. 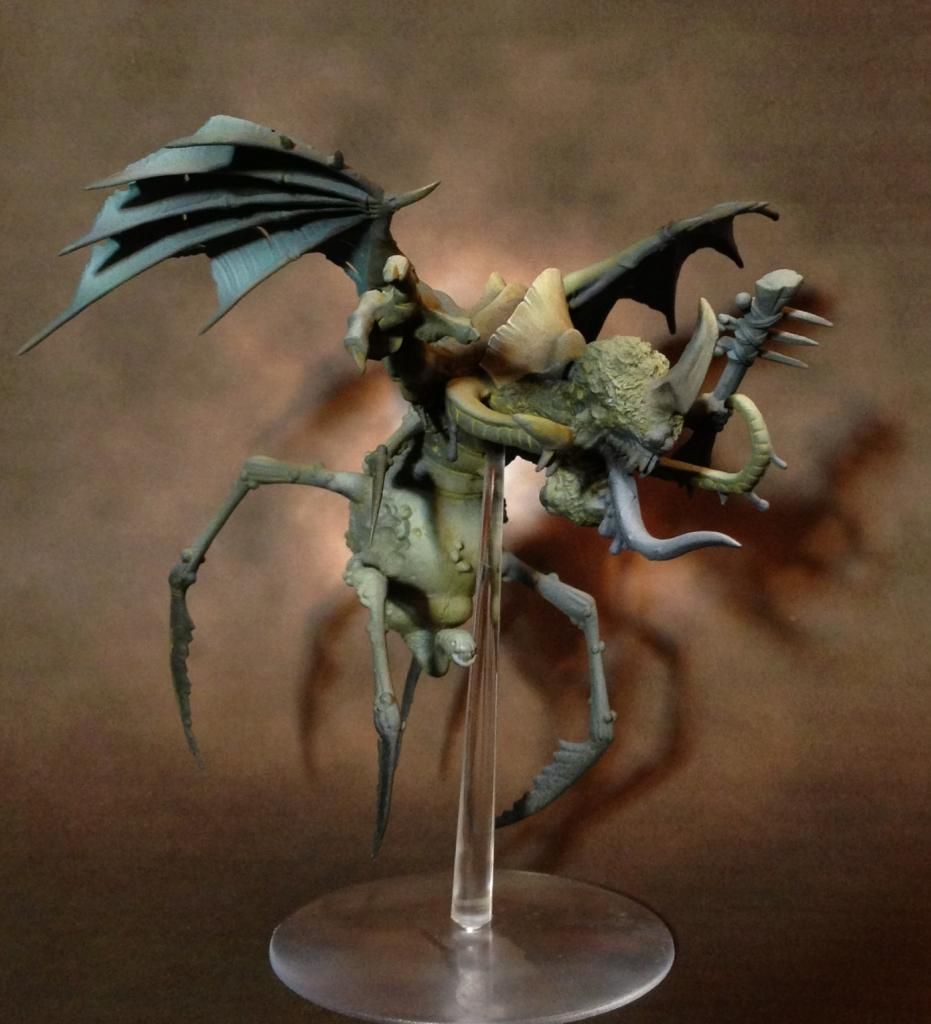 The first armor segment on its back has been taken a few steps ahead of the rest with layered washes. 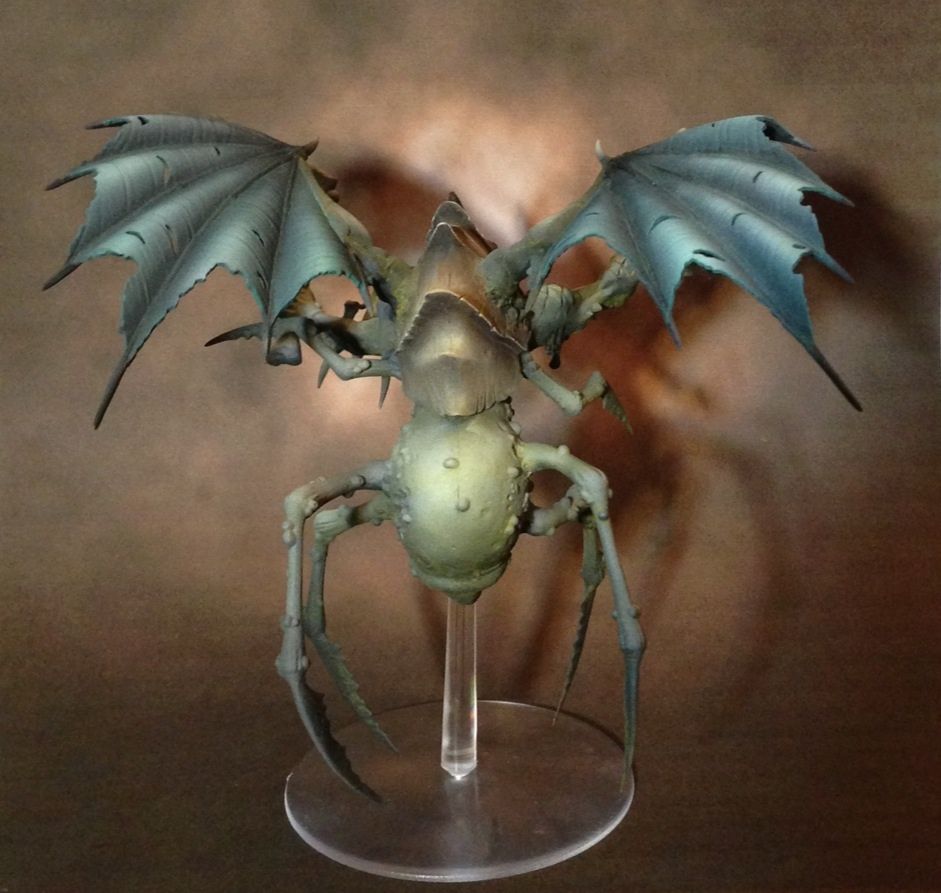 This one is getting a different technique than the last. I'll do all the shading and highlighting first and varnish/oil wash last. 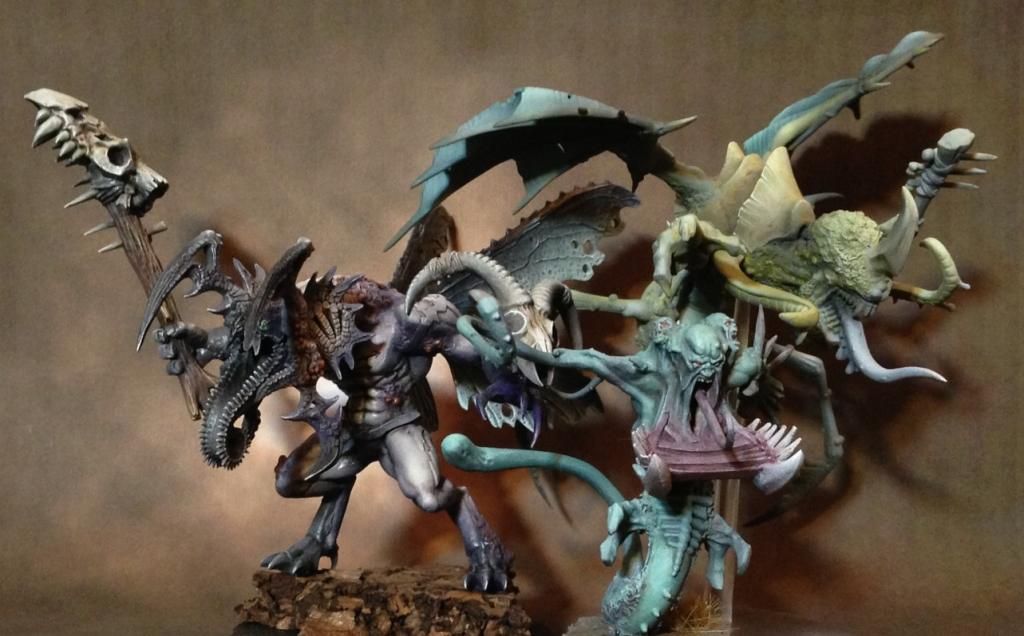 Group shot for color testing. One thing I wanted to avoid is the tendency for nurgle armies to get too muddy. I plan to work in a ton of color by desaturating it with washes so the army is colorful, but not too bright. |
|
|
|
Post by hyv3mynd on Jul 8, 2014 23:57:22 GMT -5
More washes tonight with purples, reds, and browns. 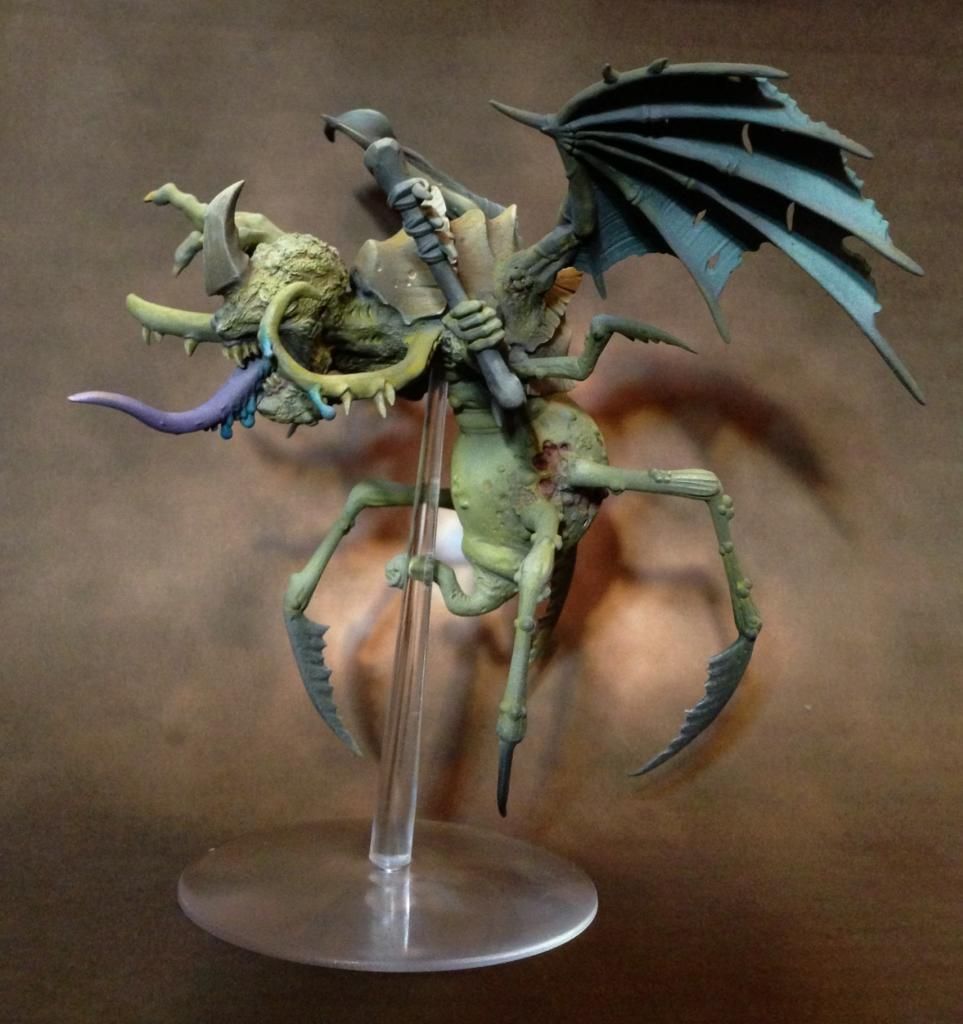 Also did some light drybrushing. 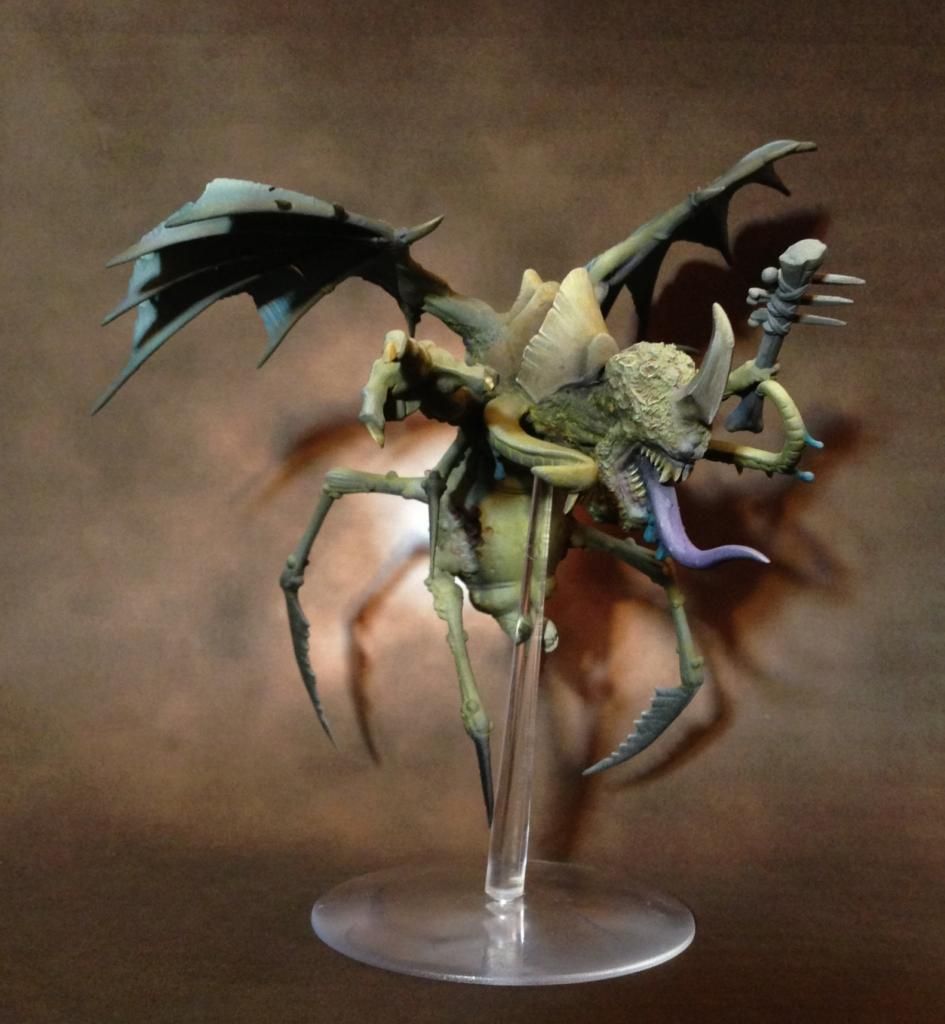 The key to this technique is extremely watered down washes to allow the grey scale airbrushed undercoat show through. You can see the club looks more black and white in its pre-washed state. 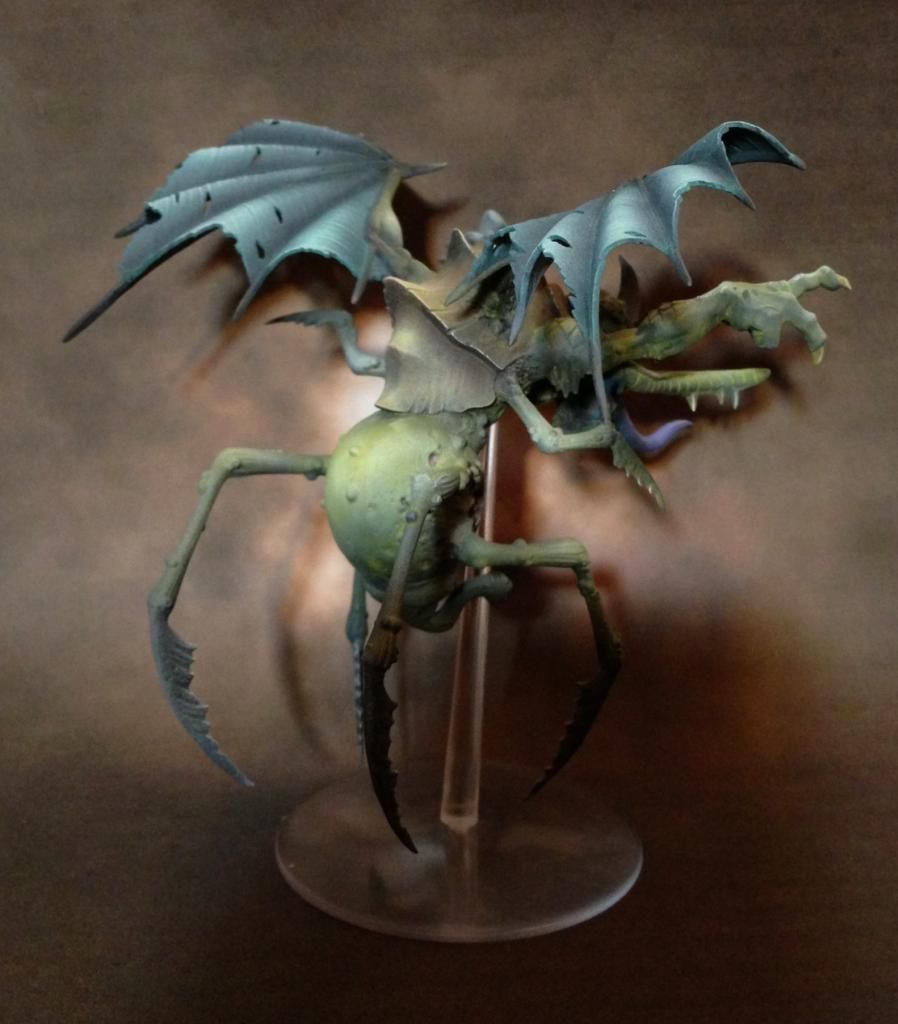 It's a slower process, but building up the layers of color with washes can be a lot easier than trying to blend the traditional ways. |
|
|
|
Post by commissarkrad on Jul 9, 2014 14:25:23 GMT -5
These are some really cool models you've made.
|
|
|
|
Post by hyv3mynd on Jul 10, 2014 16:01:01 GMT -5
Thanks Konrad. Your knights have inspired me to finish mine. After a couple nights online and digging through my stacks of sprues, a chaos conversion is coming to fruition. If I can keep grinding away at it, I hope to add it to the daemon ranks for the PTGRTS GT in two weeks.
|
|
|
|
Post by hyv3mynd on Aug 1, 2014 9:39:06 GMT -5
Riding to and from the PTGRTS GT with Dave, we were able to have some really good hobby discussions. My approach has always been "paint something so it looks cool" which I always did without a conscious agenda regarding techniques. Now that I have a better understanding of painting techniques from someone who's won some big recognition, I'm revisiting some models in hopes of upping my appearance scores. First up is my palanquin for a nurgle herald. 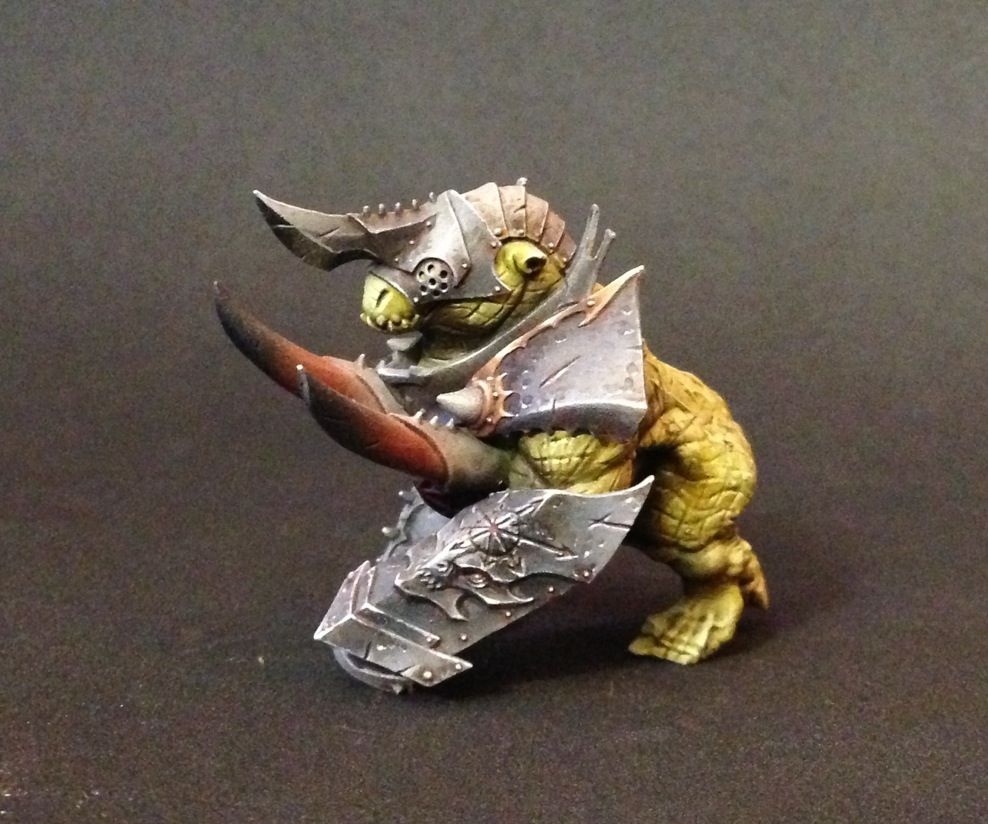 I love this portion of the WoC chariot so much I had to do something with it, so a palanquin seemed the most obvious. I used him a few times last year but he was just airbrushed and washed with some minor details added. Now, I'm going back to really tighten up some techniques like NMM (gold trim and grey armor). 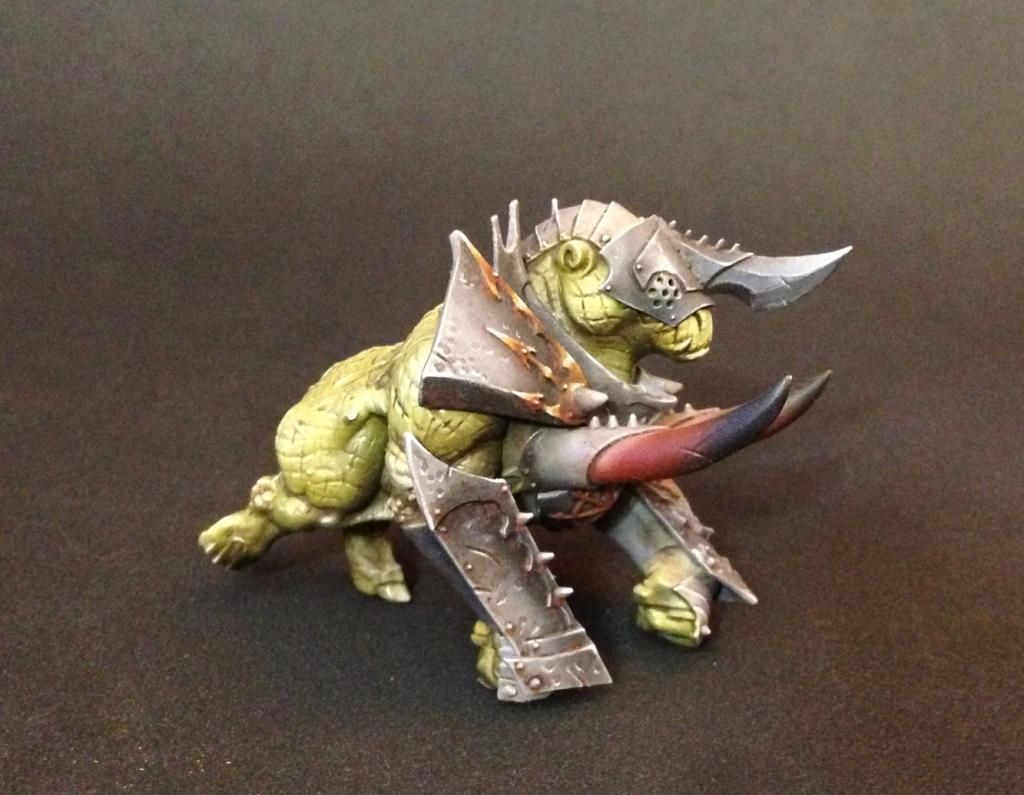 I've also started adding painted textures. If you look at the shoulder guards and vambraces, the pock marks are completely painted on. The actual armor on the model is smooth. You can see the difference compared to the helmet which hasn't been textured yet. I've also added some rust and weathering though I plan to do more at the end with pigments. |
|
|
|
Post by grubnards on Aug 1, 2014 9:54:27 GMT -5
Damn hyv3... that is looking real nice. Small details like that really make the model pop.
|
|
|
|
Post by hyv3mynd on Aug 1, 2014 13:35:17 GMT -5
Thanks man. Here's after last night's session. 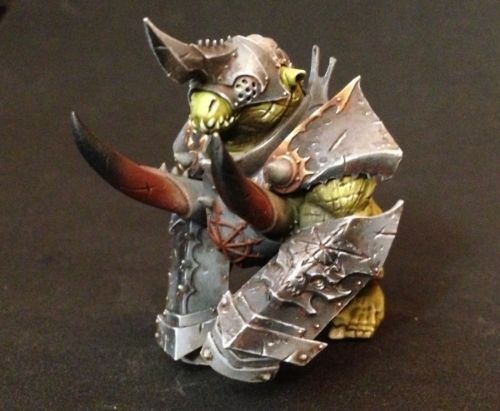 I'm not photo bombing I promise. Some of the guys in Syracuse were asking about airbrushing and finishing steps so I like to document a lot of individual sessions. It helps to show how layers are built along the way. 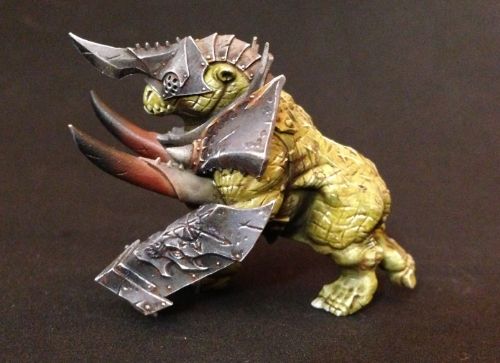 My finishing technique is very similar to water color painting. I use the airbrushed base tone as a canvas and use very watered down paint to stain the base coat. Last night's session was mostly whites and greys intensifying the edging and highlighting some of the hide and scarring on the back. |
|
|
|
Post by commissarkrad on Aug 8, 2014 21:39:41 GMT -5
Really looks great! That's a really cool paintjob on an awesome model.
|
|
|
|
Post by hyv3mynd on Aug 11, 2014 21:27:02 GMT -5
Still riding the post-tournament buzz, I started painting the herald to ride the palanquin. 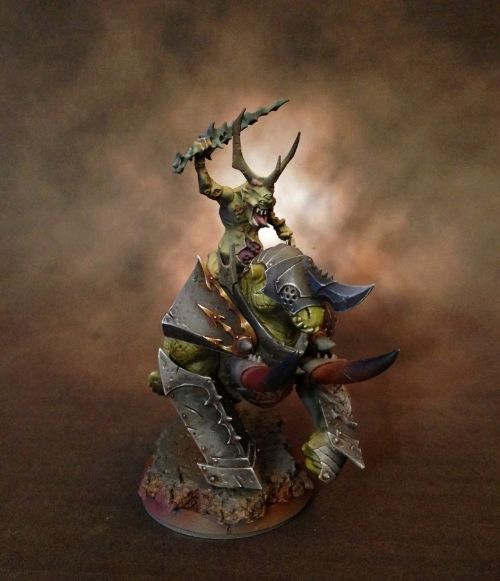 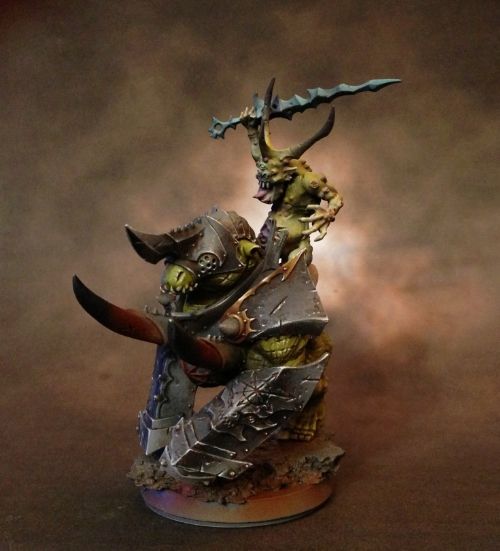 |
|
|
|
Post by koszkamade on Aug 11, 2014 22:16:33 GMT -5
Looks awesome!
Can't wait to see it all based and ready to go.
It'll be interesting to see all the other models synced up to that style.
|
|